Where to host your Ecwid sitemap if you cannot access your server

If you don't have access to your server, this tutorial will show you how to submit your sitemap to Google Webmaster by hosting your sitemap on Amazon for free.
Table of contents
Start by signing up for Amazon Cloudfront. You'll be asked to fill in some information and then you'll be asked for a credit/debit card number. Don't worry, you'll only be charged if you start uploading and sharing access to tons of files. Hosting your sitemap wont cost you anything.
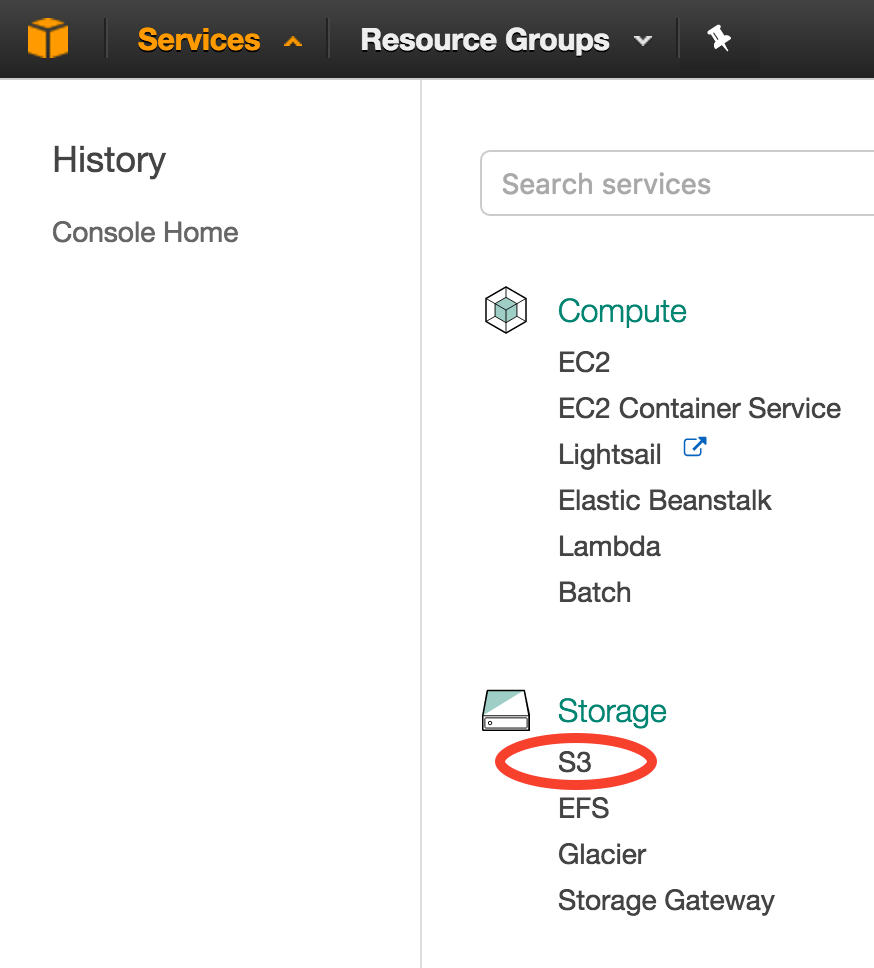
S3 Storage
Once you're signed up, open the link to the S3 Storage:
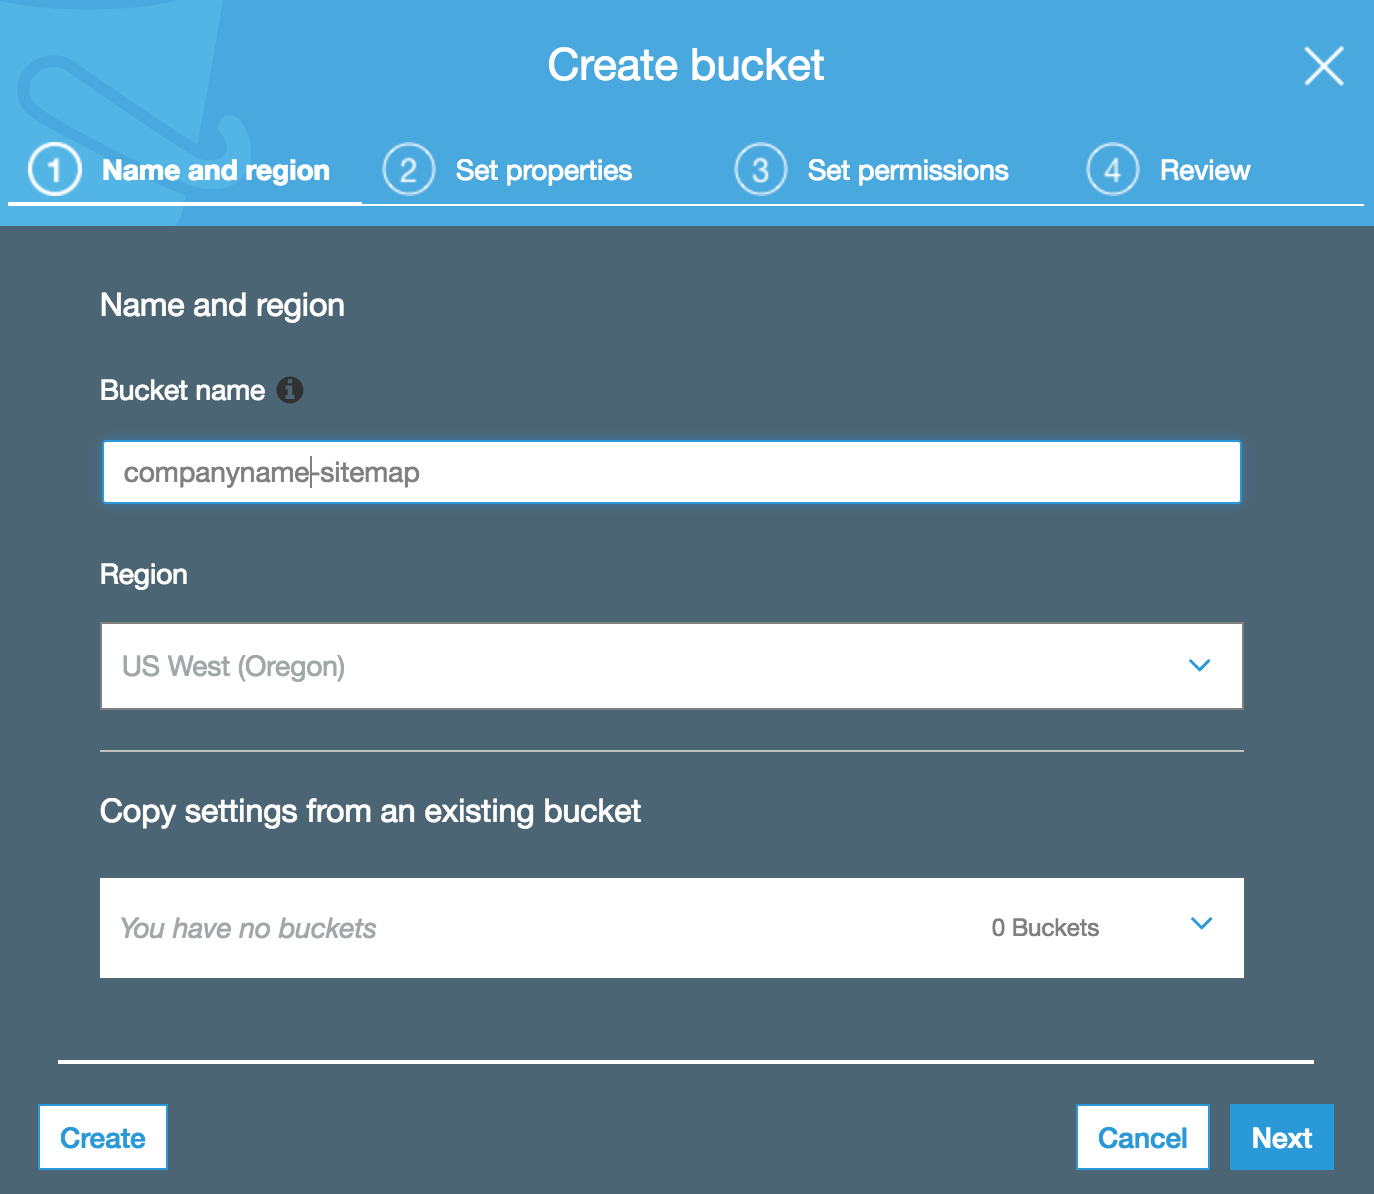
Click +Create bucket:

Give your bucket a name and select the closest region to where you are hosting your website:
Then click Next until you finish creating the bucket. Once the bucket is created, open it, and click Upload:

Make sitemap public
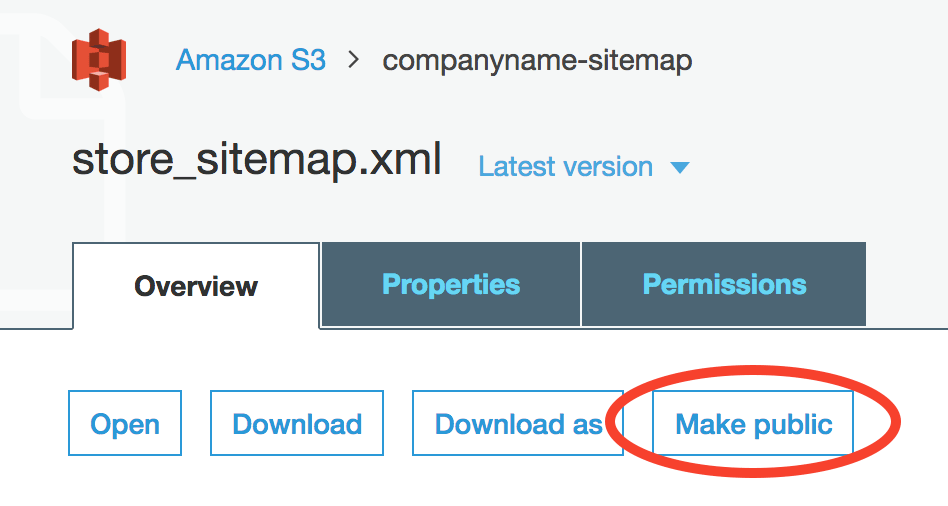
Once you've uploaded your sitemap, click on it to open it. To make it public, simply click the Make public button:
Get the link to your bucket
On the same page, scroll down to the bottom and you'll see the link to your sitemap. Click the link to make sure that it was successfully made public. If you see a message like in the image below, it was not saved as public:

Assuming the sitemap was successfully made public, refer to the URL and copy everything but the filename:

Save the link to your bucket somewhere and set it aside. We'll come back to it in a moment.
Google Webmaster
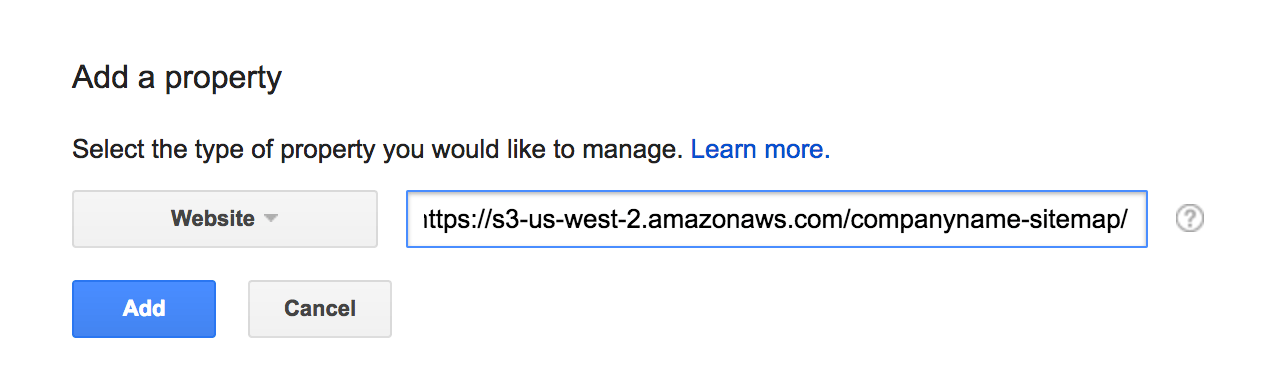
If you don't already have Google Webmaster, you can sign up here. Click ADD A PROPERTY and paste the link to your bucket:
On the next page, you'll be asked to upload a file to your Amazon bucket to verify that you own that bucket URL. Click the link to download the file:
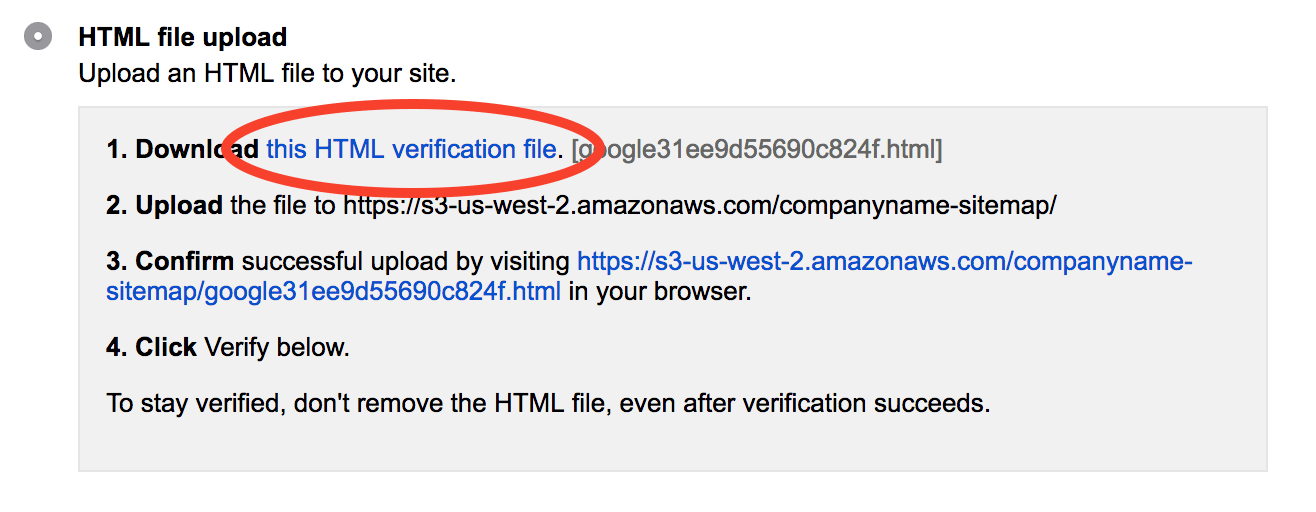
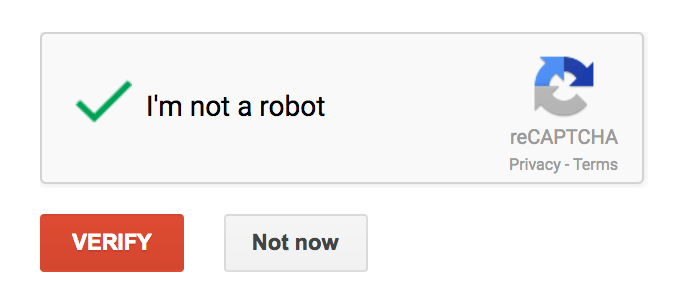
Go back into Amazon, into your bucket, and upload the file you just downloaded in the same way that you uploaded your sitemap. Don't forget to make it public. Once you've done this, go back to Webmaster and click VERIFY.
Submitting your sitemap
Now that your bucket URL has been verified and your sitemap has been uploaded, all that's left is to let Google know where the sitemap is located. In the left navigation bar, open Crawl > Sitemaps. Click ADD/TEST SITEMAP and enter the file name of your sitemap. If you didn't change it, it will likely be: store_sitemap.xml.
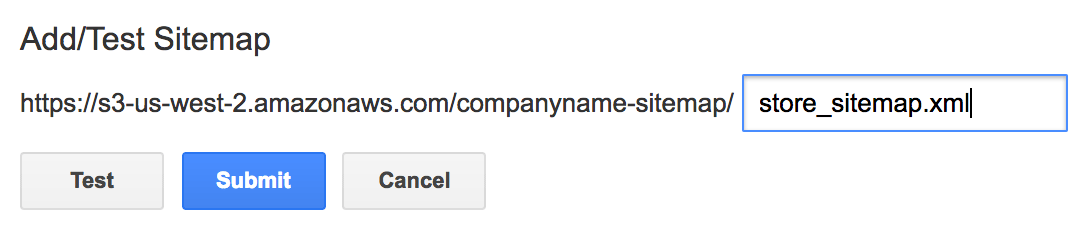
Now just click *Submit* and you're all done!