How Musers Can Blog In Adobe Muse

This post is for Adobe Muse designers that are looking to build a blog in their Adobe Muse website. This is not how you can embed a blog or place a blog in Muse with an iframe. After reading this post, you will have the tools to create 100% genuine blog posts in Muse. Again, this is for Muse designers, not necessarily for clients as clients will not be able to add more posts without using Muse.
Table of contents
What You Need:
- Blogs (Premium) widget — $3.99
- This will generate all of the necessary SEO for your page including Open Graph, Twitter Card, and Schema.org with rich snippets enabled.
- The RSS Feed widget — Free
- This will display an RSS feed on your website.
Step 1: Writing Your Post
Writing your blog post isn't any different than creating a page in Muse but here are a few tips to keep your post SEO friendly.
Headline, Subhead, and Paragraph
These tags can be applied in Text flyout panel.
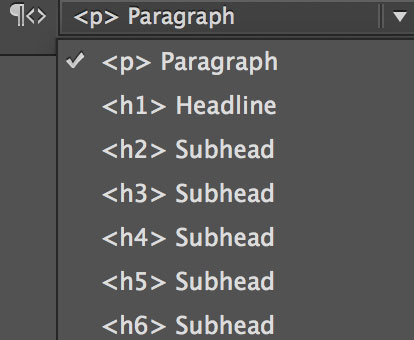
Always have 1 (and only 1) <h1> tag. This tag will be the title of your post. Use the other 5 h-tags to further break down your post. For example, in this post, I gave the title an <h1> tag, each subhead with red text an <h2> tag, and remaining subheads are using the <h3> tag. Lastly, use the <p> tag for the main text of your posts.
H-tags and the p-tag can be selected in the Text Pallet. H-Tags will help give your post structure.
Add Tooltips & Alternative Text all images used in the post
The Tooltip is essentially the title of your image and the Alternative Text is the description. You'd be surprised how helpful this can be.
A demonstration of the effectiveness of the alternative text attribute
Step 2: Blogs (Premium)
This widget will add necessary structured markup to identify your post as a blog post to search engines. Most questions about this widget will be answered here but the one section that might be confusing is the section made available to paste your blog post. The picture on the right is an example of what a pasted article would look like.
Step 3: Creating Your Blog Feed
Now that your post is created, it's time to create your blog feed. Blog feed are important to have for multiple reasons. First, it helps search engines know when you've made an update to your blog. Second, it's required for the RSS Feed widget. To begin generating your blog feed, head over here.
Once you've generated your blog posts, open your text editor. As mentioned above, you can use any text editor including Sublime, Brackets, Dreamweaver, etc. If you are already a creative suite subscriber, then Dreamweaver is probably the easiest to download. Paste the feed into your text editor, give your file a name, and save it with the extension of .xml.
Step 4: Using The RSS Feed Widget
Everything you need to know for the RSS feed widget can be read here. Use the RSS Feed Notifier to let browsers know that an RSS feed lives on the website. This will cause the browser to display an RSS icon in the URL. You can see an example of this in the image on the right. The RSS Feed Notifier should be placed on the Master Page(s).
Step 5: Adding Posts To The Feed
Whenever you write a new post, you'll want to add it to your blog feed. Each blog post is called an Item in the RSS feed so to add more posts, use the RSS item generator. Paste each new item after the </description> tag and before the first <item> tag.
Each blog post is called an item. Paste items before the most recent item and after the description tag.
Once you've added your new post, save the feed, and reupload it. Your RSS feed will automatically add the new post! Comment below if you have any questions!